Vue.js Real-time Chat Tutorial
Check out the live example 🚀. As well as the full source code on GitHub 👩🏽💻.
In the world of web apps, adding chat features used to be a nice extra, but now it's a must-have. Think about having an online store, a social network, or a tool for working together without the option to chat in real time. It's like having a phone without being able to make calls - it just doesn't work.
Imagine this: a user is using your web app and wants to talk to a friend. With chat, they don't have to leave the app to chat in real time; they can do it right within the app.
In this tutorial, we'll show you how to do this. We'll build a chat app using Vue.js and a tool called Scaledrone, which makes real-time chatting really easy. The app will work like Messenger, WhatsApp, or Telegram.
We'll use the modern Vue.js 3 web app framework and follow the best practices, like the Composition API and Single-File Components.
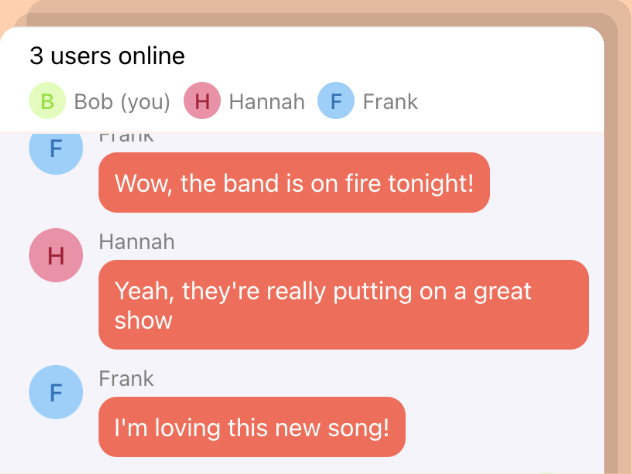
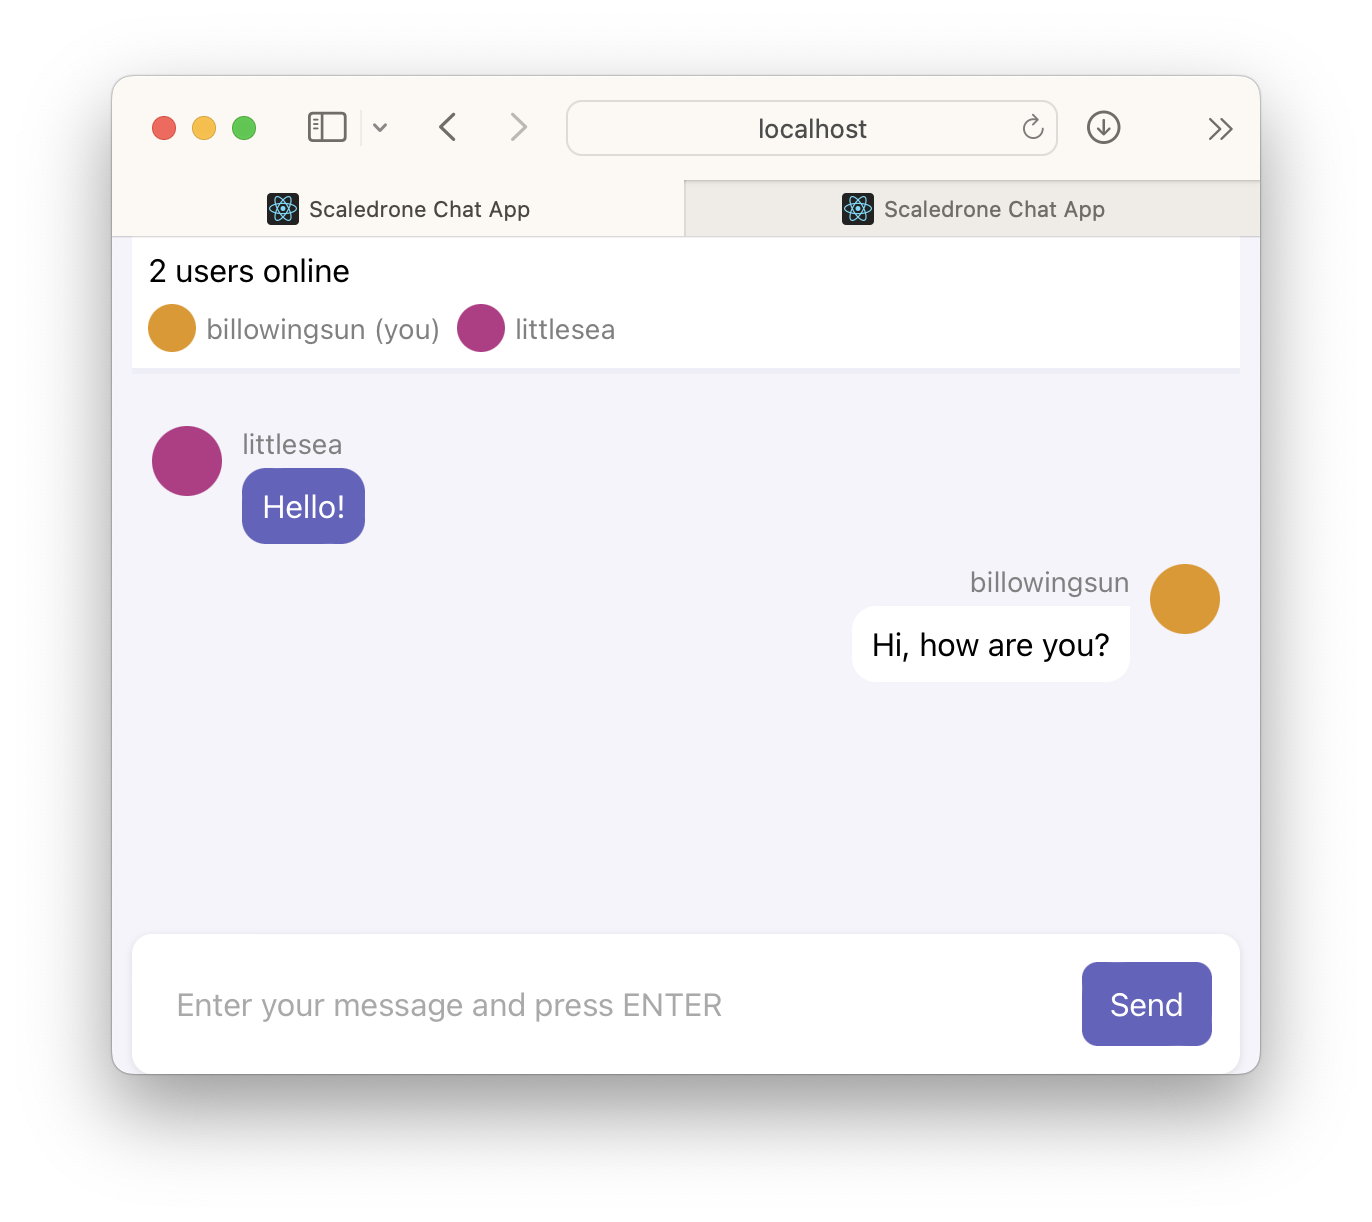
By the end, this is what our chat app will look like:
And here's the cool part: the users of your Vue chat app will be able to chat with mobile users if you've already built an app using our iOS and Android chat tutorials.
Let's get started!
Setting Up a Vue.js Chat App
To focus on the meat of creating a Vue.js chat app, we took care of some of the scaffolding for you. You can begin by cloning the starter branch of this tutotorial's GitHub repository.
git clone -b starter https://github.com/ScaleDrone/vue-chat-tutorial.git
Aside from a couple of empty folders and an empty Vue.js web app, this project also contains some CSS to make your chat app look nicer.
Next, build Vue.js 3 and its dependencies using the Node package manager:
npm install
Note: Follow the instructions to install npm and Node.js if you don't have them on your machine.
Finally, you can run the app:
npm run dev
The command will run your app on localhost:5174, although if you visit the site it will be wholly unimpressive — a blank screen. Don't worry, you'll see your chat app come alive in no time!
Showing Chat Messages Using Vue Components
Your chat app with consist of three main parts:
App.vuewhich will take care of the main business logic of fetching chat messages and managing users as well as connect all of the UI together.- A
Messagescomponent that will show a list of messages. - An
Inputcomponent with a text field and button so that we can send our messages.
App.vue is already provided for you in the src folder, and we'll modify it later. But first, we'll create a Messages component.
Create a new file in your src/components folder called Messages.vue. Create a new component in this file called Messages like in the following code:
<script setup>
import { onUpdated, ref } from 'vue';
import Message from './Message.vue';

const props = defineProps({
  messages: Array,
  me: Object,
});

const bottomRef = ref(null);

onUpdated(() => {
  bottomRef.value.scrollIntoView({ behavior: 'smooth' });
});
</script>
The component will receive the messages it should display as a prop from App. We'll render a list containing each message. The list items themselves will contain the sender's name and avatar, as well as the text of the message.
Looking at the code, you might be wondering what bottomRef and onUpdated do.
When a new message arrives, you don't want to waste time repeatedly scrolling through a long list of previous messages just to reach the latest one. Instead, your app should automatically take you to the most recent message as soon as it appears. You do this using bottomRef, which is a reference to an empty div positioned beneath the latest message.
For this to happen automatically, you'll use Vue's onUpdate lifecycle function. This function allows you to register a callback that gets executed each time the component is rendered. Within the callback, you instruct Vue to scroll down to bottomRef, ensuring that you always end up at the very latest message.
Next, add a template to the file to make sure we show a list of messages:
<template>
  <ul class="messagesList">
    <Message
      v-for="message in messages"
      :key="message.id"
      :member="message.member"
      :data="message.data"
      :id="message.id"
      :me="me" />
    <div ref="bottomRef"></div>
  </ul>
</template>
Messages returns a list of Message components, which you'll implement next.
Add another component in the folder called Message.vue. Add the following code to the file:
<script setup>
import { defineProps } from 'vue';

const props = defineProps({
  member: Object,
  me: Object,
  data: String,
  id: String,
});

const { username, color } = props.member.clientData;
const messageFromMe = props.member.id === props.me.id;
const className = messageFromMe
  ? "messagesMessage currentMember"
  : "messagesMessage";
</script>
Each message is linked to a specific member (user), and every member is identified by an ID, username, avatar and a personalized color. Here, you check whether the message came from you or another user. This distinction is helpful because it allows us to display our own messages on the left side.
Next, add the following template to the file:
<template>
  <li :key="id" :class="className">
    <span class="avatar" :style="{ backgroundColor: color }" />
    <div class="messageContent">
      <div class="username">{{ username }}</div>
      <div class="text">{{ data }}</div>
    </div>
  </li>
</template>
The template shows the user's avatar, their name, and the message's content.
Now that we have the Messages component, we need to make sure App.vue actually renders it. Head over to src/App.vue and add an import of the Messages component to the top of the file:
import Messages from './components/Messages.vue';
We talked about showing usernames and avatars in our app earlier. Usually, you'd have a login screen to collect this info.
But for this tutorial, let's keep it simple. We'll make up random names and colors for the avatars. You can do this by adding the following functions just below the import statement:
function randomName() {
  const adjectives = [
    'autumn', 'hidden', 'bitter', 'misty', 'silent', 'empty', 'dry', 'dark',
    'summer', 'icy', 'delicate', 'quiet', 'white', 'cool', 'spring', 'winter',
    'patient', 'twilight', 'dawn', 'crimson', 'wispy', 'weathered', 'blue',
    'billowing', 'broken', 'cold', 'damp', 'falling', 'frosty', 'green', 'long',
    'late', 'lingering', 'bold', 'little', 'morning', 'muddy', 'old', 'red',
    'rough', 'still', 'small', 'sparkling', 'shy', 'wandering',
    'withered', 'wild', 'black', 'young', 'holy', 'solitary', 'fragrant',
    'aged', 'snowy', 'proud', 'floral', 'restless', 'divine', 'polished',
    'ancient', 'purple', 'lively', 'nameless'
  ];
  const nouns = [
    'waterfall', 'river', 'breeze', 'moon', 'rain', 'wind', 'sea', 'morning',
    'snow', 'lake', 'sunset', 'pine', 'shadow', 'leaf', 'dawn', 'glitter',
    'forest', 'hill', 'cloud', 'meadow', 'sun', 'glade', 'bird', 'brook',
    'butterfly', 'bush', 'dew', 'dust', 'field', 'fire', 'flower', 'firefly',
    'feather', 'grass', 'haze', 'mountain', 'night', 'pond', 'darkness',
    'snowflake', 'silence', 'sound', 'sky', 'shape', 'surf', 'thunder',
    'violet', 'water', 'wildflower', 'wave', 'water', 'resonance', 'sun',
    'wood', 'dream', 'cherry', 'tree', 'fog', 'frost', 'voice', 'paper', 'frog',
    'smoke', 'star'
  ];
  const adjective = adjectives[Math.floor(Math.random() * adjectives.length)];
  const noun = nouns[Math.floor(Math.random() * nouns.length)];
  return adjective + noun;
}

function randomColor() {
  return '#' + Math.floor(Math.random() * 0xFFFFFF).toString(16);
}
To make things interesting, we'll create usernames by mixing random adjectives with nouns, giving us usernames like "hiddensnow" or "wanderingfrog." As for the colors, we'll keep them as unique as possible by choosing random hex numbers and converting them to HTML color codes.
Now that we have those functions, we can use them to set our initial state in App. Add the following below the two functions you just created:
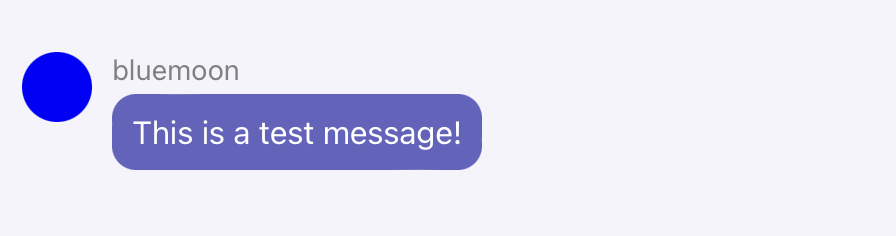
const messages = ref([{
  id: '1',
  data: 'This is a test message!',
  member: {
    id: '1',
    clientData: {
      color: 'blue',
      username: 'bluemoon',
    },
  },
}]);
const me = ref({
  id: '0',
  clientData: {
    color: randomColor(),
    username: randomName(),
  },
});
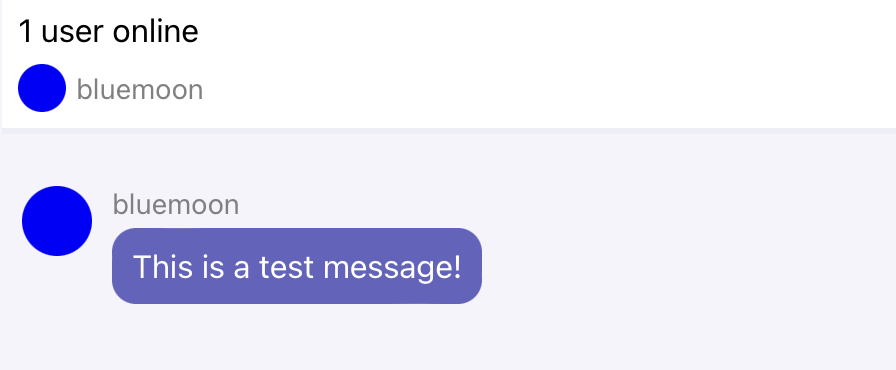
For the time being, our initial state will be one test message from a mysterious hard-coded user called bluemoon. As for our own identity, we'll use a randomly generated name and color.
Next, update the template by adding the following inside the <div class="appContent"> element:
<Messages :messages="messages" :me="me" />
This will allow you to display a list of chat messages, using the component you created earlier.
Head back to your browser to see your chat message!
Adding a Text Field Input to the Web App
Now that we have a way to display our messages, we need a way to type them! You'll create a new Vue component called Input that contains a text field and a send button. The component itself won't send any messages but will call a callback whenever someone clicks the send button.
Create a new file in the src/components folder called Input.vue. Add a new component to the file:
<script setup>
import { ref, onMounted, defineProps } from 'vue';

const props = defineProps({
  onSendMessage: Function,
});

const text = ref('');
</script>

<template>
  <div class="input">
    <form @submit.prevent="onSubmit">
      <input v-model="text" @input="onChange" />
      <button type="button" @click="onSubmit">Send</button>
    </form>
  </div>
</template>
This component will have a text field to enter the message along with a button to send it. We'll keep track of the currently entered text in our text reference. You'll notice we connected a function called onChange to the input element. Add that function inside the script setup element:
function onChange(e) {
  const textValue = e.target.value;
  text.value = textValue;
}
This will make sure we always have the most recently typed message inside the text reference.
Next, we need to handle sending the message, so add the following function:
function onSubmit() {
  props.onSendMessage(text.value);
  text.value = '';
}
To send the message, we'll use a callback inside the component's props which we'll receive from App. We'll also update the ref so that we clear the text field.
Now Input is all done!
Just like we did with Messages, we need to make sure App will render Input. Head over to src/App.vue and add the import for your new component to the top of the file:
import Input from './components/Input.vue';
Next, update the contents of the render method to show the Input component inside the appContent div:
<Messages :messages="messages" :me="me" />
<Input :onSendMessage="onSendMessage" />
Notice that you pass a callback (onSendMessage) to Input. Input will call this each time the user presses the send button.
Finally, you'll implement that callback to "send" a message. Add the following function just before the closing </script> tag:
function onSendMessage(message) {
  const newMessage = {
    data: message,
    member: me.value
  }
  messages.value.push(newMessage)
}
For now, we'll just add it to the messages array. Later, we'll connect this to a web service to actually send messages back and forth.
If you head back to your web browser you should see an input field. Type in a message, hit Enter, and watch your message display in the list.
Look at this, your chat app is taking shape! Kudos to you!
Showing a List of Online Members in a Chat App
Before we connect everything to a web service, there is one more part of our chat UI that we'll tackle. In a group chat setting, it's useful to show a list of currently active users. We'll do that with a simple Vue component.
Create a new file in src/components called Members.vue. There, you can add the following code:
<script setup>
import Member from './Member.vue';
import { defineProps } from 'vue';

const props = defineProps({
  members: Array,
  me: Object,
});
</script>
This will be a simple, stateless component that takes a list of members and the current member.
Next, add a template to the file:
<template>
  <div class="members">
    <div class="membersCount">
      {{ members.length }} user{{ members.length === 1 ? '' : 's' }} online
    </div>
    <div class="membersList">
      <Member v-for="member in members" :key="member.id" :id="member.id" :client-data="member.clientData"
        :is-me="member.id === me.id" />
    </div>
  </div>
</template>
Using the two pieces of data from props, this code renders a list of Member components, which you'll add as a separate src/components/Member.vue file:
<script setup>
const props = defineProps({
  id: String,
  clientData: Object,
  isMe: Boolean,
});
</script>

<template>
  <div :key="id" class="member">
    <div class="avatar" :style="{ backgroundColor: clientData.color }" />
    <div class="username">{{ clientData.username }} {{ isMe ? ' (you)' : '' }}</div>
  </div>
</template>
This component shows the member as text, adding "(you)" to the end of the text if it's the current user's username.
By now you probably know what's coming next.
We'll show this component from src/pages/index.js. Head on over there and add a new import to the top of the file:
import Members from './components/Members.vue';
Next, add a new reference right after where me is declared:
const members = ref([{
  id: "1",
  clientData: {
    color: 'blue',
    username: 'bluemoon',
  },
}]);
This state variable will keep track of active members. For now, we'll hard-code a member. In the next section, we'll fetch members from a web service.
Finally, add your new component to the JSX, right above Messages:
<Members :members="members" :me="me" />
<Messages :messages="messages" :me="me" />
Run the app again and you'll see bluemoon in the list of chat members!
Now, let's roll up our sleeves and connect everything to a real web service using Scaledrone.
Connecting the Chat App to a Web Service
At first, the thought of creating a chat application that seamlessly delivers messages in real time can be a bit daunting. Fortunately, Scaledrone comes to the rescue, simplifying the business logic involved in developing such an app.
Before we dive into its usage, though, we have to ensure that Scaledrone is part of our app. Here's how.
Installing Scaledrone is as easy as ading a JavaScript script inside your Vue project. Open index.html in the root folder of the project. Inside the head tag, add the following line to the bottom of the tag:
<script type='text/javascript' src='https://cdn.scaledrone.com/scaledrone.min.js'></script>
This will make sure Scaledrone's code is included in our app. We're almost ready to start using it, but we need to do one more thing first: create a Scaledrone channel.
To successfully connect to Scaledrone, you need to get your own channel ID from Scaledrone's dashboard. If you haven't already, head over to Scaledrone.com and register an account. Once you've done that, go to your dashboard and click the big green +Create Channel button to get started. You can choose Never require authentication for now. Note down the channel ID from the just created channel, you'll need it in a bit.
Head back to src/App.vue. We'll add a function to connect to Scaledrone, but first, we need to do a bit of prep work.
Add a new top-level object to the file inside the script setup tag:
let drone = null
We'll use this variable to store a global Scaledrone instance that we can access in the component.
Add a new function to the top of the component to connect to Scaledrone:
function connectToScaledrone() {
  drone = new window.Scaledrone('YOUR-CHANNEL-ID', {
    data: me.value,
  });
  drone.on('open', error => {
    if (error) {
      return console.error(error);
    }
    me.value.id = drone.clientId;
  });
}
This will create a new instance of Scaledrone. Just remember to replace the string with the channel ID you got earlier. Since we're loading the script inside our HTML head tag, the script's contents will be attached to the global window object. That's where we'll ultimately fetch our Scaledrone instance from.
We'll also pass Scaledrone the data for the currently logged-in member. If you have additional data about the user or the client, this is a good way to supply that data, instead of having to send it with each message.
Moving on, we need to connect to a room. A room is a group of users that we can send messages to. You listen to those messages by subscribing to a room of a specific name. Add the following code to the end of the function you just created:
const room = drone.subscribe('observable-room');
We'll subscribe to a room.
Note: You might have noticed that we named our name Scaledrone room
observable-room. You can name the room anything you want, a single user can actually connect to an infinite amount of rooms for all sorts of application scenarios. However, in order for messages to contain the info of the sender, you need to prefix the room name with"observable-". Read more...
We also need to know when the messages arrive, so we'll subscribe to the "message" event on the room. Add the following code to the end of the constructor:
room.on('message', message => {
  const { data, member } = message;
  messages.value.push(message)
});
When we get a new message, we'll add the message's text as well as the client data to our state.
Similarly, we need to track the logged-in members:
room.on('members', newMembers => {
  members.value = newMembers;
});
room.on('member_join', member => {
  members.value.push(member);
});
room.on('member_leave', ({ id }) => {
  const index = members.value.findIndex(m => m.id === id);
  members.value.splice(index, 1);
});
Scaledrone gives up the logged in members when we join and then keeps us updated when someone else joins or leaves. We'll make sure to keep our state variables updated with the correct members.
Now you just need to make sure the function is called when the component loads. Add this code right below the function definition:
onMounted(() => {
  if (drone === null) {
  	connectToScaledrone();
  }
});
You do a small check to make sure Scaledrone is not already connected and then call the function.
Next, we need to modify onSendMessage to publish a new message to all the other users in the room:
function onSendMessage(message) {
  drone.publish({
    room: 'observable-room',
    message,
  });
}
Scaledrone makes this a simple matter of calling the publish function with the data.
Finally, we'll remove the test message and other hard-coded data from the refs so that the initial state looks like the following:
const messages = ref([]);
const members = ref([]);
const me = ref({
  username: randomName(),
  color: randomColor(),
});
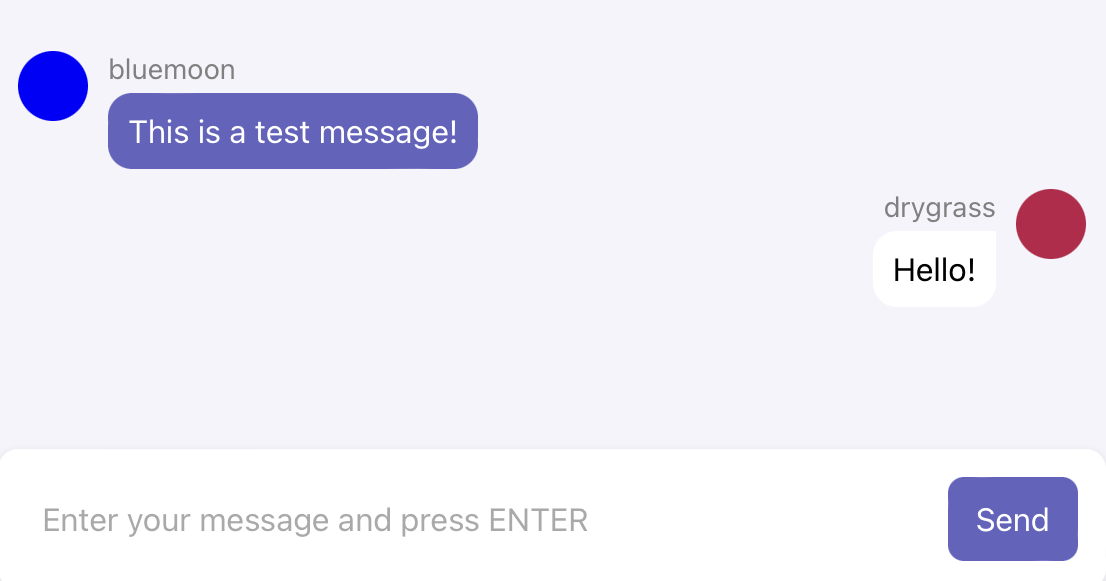
If you switch to your web browser at this point, you'll notice that the behavior remains the same: when you send a new message, it should appear in the list. The difference is that this time it's actually being sent to Scaledrone. Feel free to open the app in another tab and chat with yourself. :)
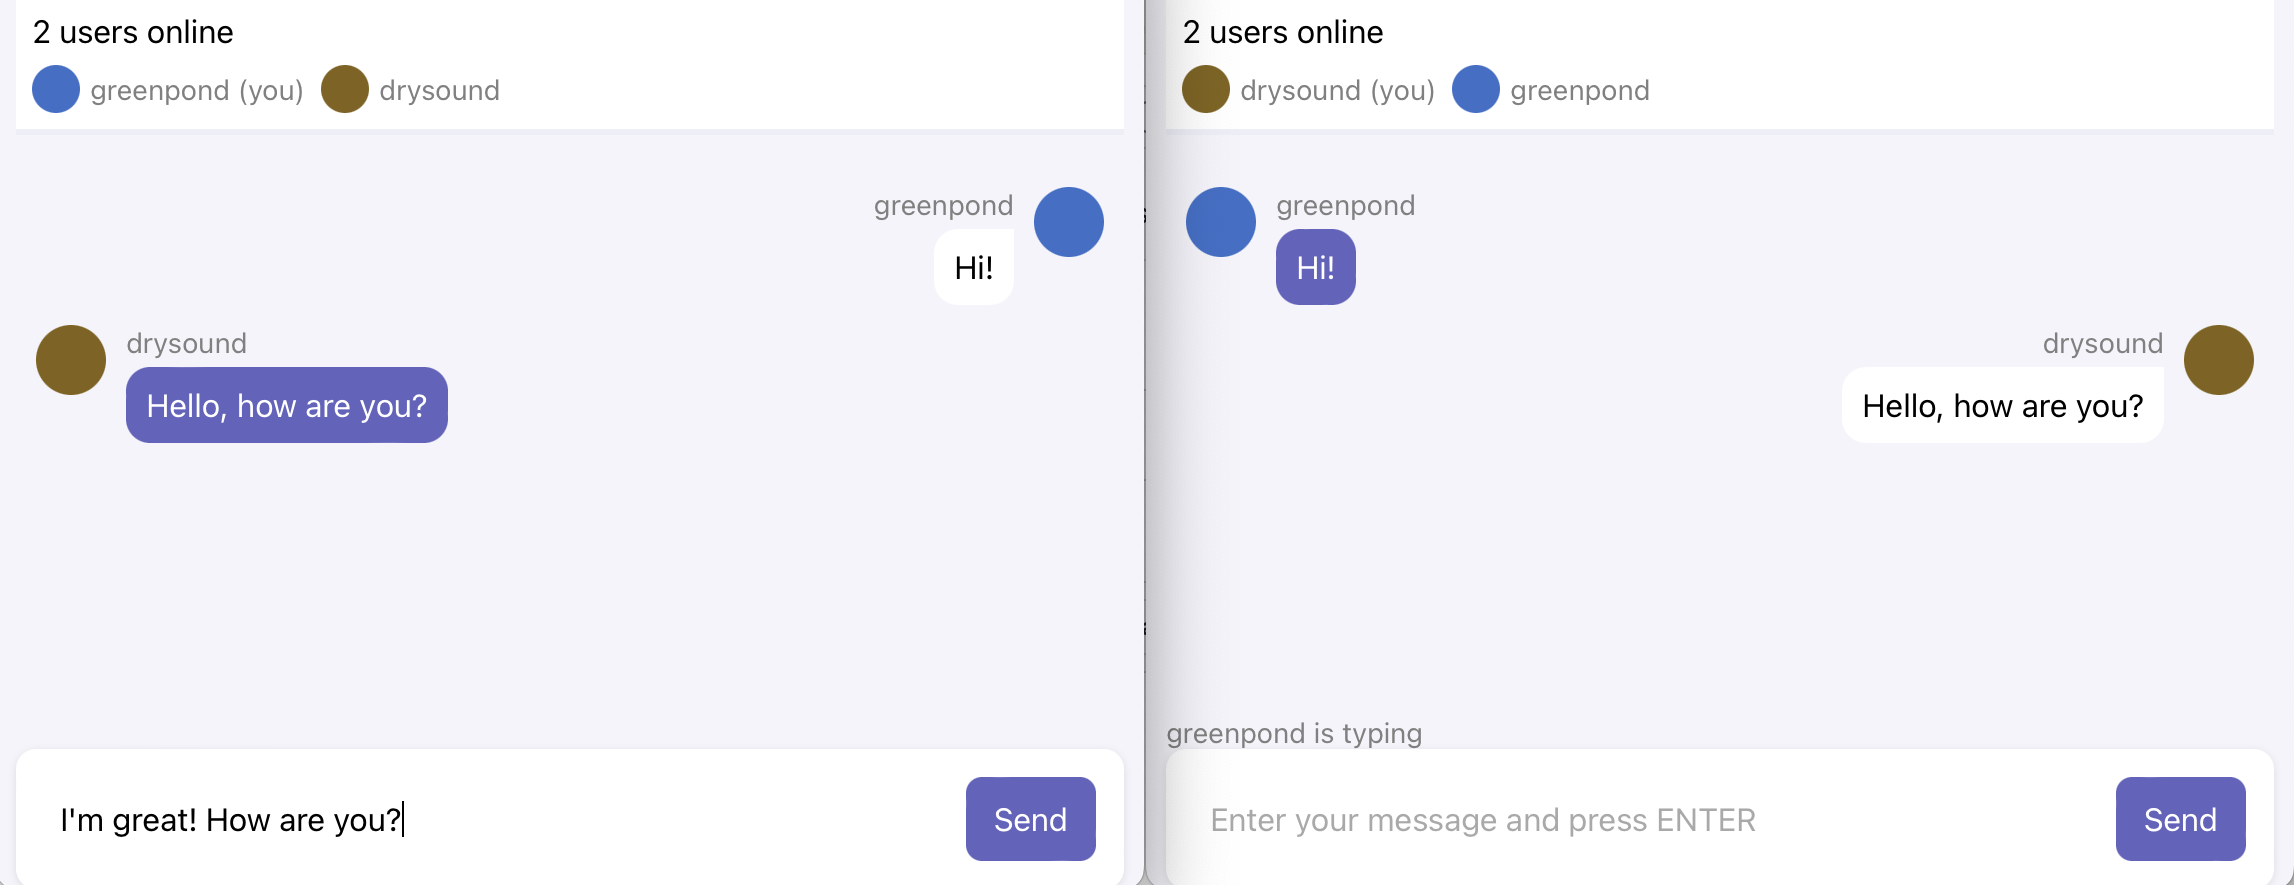
Adding a Typing Indicator to a Vue Chat App
When you're chatting away on an app, you'd like to know what's happening on the other side. Has the other person seen your message? Are they typing back? Thankfully, with nifty features like 'read' notifications and typing indicators, chat apps keep us in the loop.
Fear not; Scaledrone makes this a walk in the park. Let's see how it's done.
Creating a Vue Typing Indicator Component
As you can assume, we'll now add a typing indicator. Ours will display a message like "hiddenstar is typing."
The first step includes creating a new Vue component that will render the typing text. To begin, create a new file in src/components called TypingIndicator.vue. Then, add the following code:
<script setup>
import { defineProps, computed } from 'vue';

const props = defineProps({
  members: Array,
});

const typingText = computed(() => {
  // 1
  const names = props.members.map((member) => member.clientData.username);
  if (names.length === 0) {
    return '';
  }
  // 2
  if (names.length === 1) {
    return `${names[0]} is typing`;
  }

  return `${names.slice(0, -1).join(', ')} and ${names.slice(-1)} are typing`;
});
</script>
This component will eventually add a small div that gets filled with text inside typingText when someone is typing. You will pass a list of users that are currently typing to this component. Here's how it works:
- First, you get a list of usernames of all the members that are currently typing. If nobody is typing, an empty string is returned.
- If one person is typing, the text mentions their name such as "mysteriousrabbit is typing."
- In case more people are typing, their names are joined using a comma as a separator. The text then reads something like: "mysteriousrabbit, coolfrog and bluecar are typing."
Next, add a template to the file to show the typing text:
<template>
  <div class="typingIndicator">
    <p>{{ typingText }}</p>
  </div>
</template>
Now that we have the component, we need code to show it on the web app. Open src/App.vue and import your new component at the top of the file:
import TypingIndicator from './components/TypingIndicator.vue';
Next, you have to modify the template to show the typing indicator right under the Messages component, like so:
<Messages :messages="messages" :me="me" />
<TypingIndicator :members="members.filter(m => m.typing && m.id != me.id)" />
The code above shows the new component and passes it a list of users who are typing by checking the typing property.
The UI is now set up, all that's left is to track and send the typing state.
Tracking if the User is Currently Typing in Vue
Right now, we aren't tracking users' typing status. And it's not as black and white as simply typing/not typing.
Someone could begin typing a message and then get sidetracked—maybe they felt like brewing a coffee—leaving their message unfinished. Conversely, if the typing indicator pops up every time someone pauses to hunt for the right emoji, it might just irk your users.
That's where Scaledrone and its optional library called Typing Indicator step in to handle all of this for you.
Note: While Typing Indicator is created by and for Scaledrone, it is framework-agnostic and works with any JavaScript application or website, whether's it's built in Vue, React or something else entirely.
To install Typing Indicator, navigate to the project folder in Terminal and type in:
npm i typing-indicator
This little command will install the library.
You'll track the typing state from src/components/Input.vue, so navigate there and import the library at the top of the file:
import TypingIndicator from 'typing-indicator';

let typingIndicator = null;
You also create a top-level variable to hold an instance of the typing indicator.
Next, change the definition of props to include a new function:
const props = defineProps({
  onSendMessage: Function,
  onChangeTypingState: Function,
});
onChangeTypingState is a callback that you'll define in App.vue, but Input will call it when the current user changes their typing state.
Then, you'll add a new typing indicator when the component loads by adding the following code inside the component, right below where the props are declared:
onMounted(() => {
  if (typingIndicator === null) {
    typingIndicator = new TypingIndicator();
    typingIndicator.listen(props.onChangeTypingState);
  }
});
When this component loads, you will register a callback to get called whenever a user begins or stops typing.
Next, we need to tell the typing indicator when the text changes, so update onChange to the following:
function onChange(e) {
  const textValue = e.target.value;
  typingIndicator.onChange(textValue);
  text.value = textValue;
}
The typing indicator does the heavy lifting of tracking typing states for you. All you need to do is connect it to a function, which, in this case, is onChangeTypingState, and tell it when the text has changed.
Now, let's wrap things up in src/pages/App.vue by passing the callback in. Navigate there and modify the Input declaration inside the template to the following:
<Input
  :onSendMessage="onSendMessage"
  :onChangeTypingState="onChangeTypingState" />
This will ensure that Input calls onChangeTypingState, which you'll implement next.
Sending and Receiving the Typing State to Your Web Service
Right now, you are passing onChangeTypingState to Input but you haven't yet created the function. The function needs to send a message to Scaledrone, letting other users know that the current user is typing.
To continue, add the following function above the closing </script> tag:
function onChangeTypingState(typing) {
  drone.publish({
    room: "observable-room",
    message: { typing },
  });
}
onChangeTypingState receives a boolean that indicates whether the user is typing or not. Using Scaledrone, you'll publish a new message with the updated typing state whenever it changes.
Next, we need to process the incoming typing messages and show the typing indicator. You'll do this in the connectToScaledrone. Modify the call to room.on('message', ...) to the following:
room.on('message', message => {
  const { data, member } = message;
  if (typeof data === 'object' && typeof data.typing === 'boolean') {
    const index = members.value.findIndex(m => m.id === member.id);
    members.value[index].typing = data.typing;
  } else {
    messages.value.push(message)
  }
});
Here's the breakdown of what this code does:
The code first evaluates the type of incoming message. If the message is a typing status, you identify the members currently typing and update their typing attribute. Otherwise, if it's a regular message, you add it to messages.
With this setup, you can monitor users' typing status and relay it to Scaledrone. When a new typing notification comes from Scaledrone, the user's typing attribute is updated. Lastly, the TypingIndicator component will use this status and display a typing indicator for users with typing set to true.
Head back to your browser to see the typing indicator in action!
All Wrapped Up!
There you have it! You've successfully crafted a modern Vue.js 3 chat application, and thanks to Scaledrone's capabilities, you made it seem like a breeze. The days of getting lost in backend code are over. With the aid of Scaledrone, you can dedicate yourself to refining your UI and enhancing your app's features without a second thought about backend hassles. **See the full source code for this Vue.js chat tutorial on GitHub.
But there's so much more potential for your chat app. Interested in expanding its features? Here are some cool additions you can add using Scaledrone's APIs:
- Share images and files
- Implement authentication
- Respond to specific messages
- Incorporate stickers and GIFs
If you have any questions or wish to share feedback, don't hesitate to reach out to us; we're always happy to connect.