How to Recognize Languages and Names With Natural Language on iOS
If your app deals with user input text in any way, there's a good chance you will benefit from machine learning text analysis. You might want to suggest categories or tags based on the description of an item or content of a post. If you have an app that works across languages, you can detect the language of a string and translate it to the user's native language. You might want to know what a piece of text is about for faster search, better recommendations or better targeted ads. The possibilities are endless.
In all of these cases, iOS offers a one-stop-shop for all your text-related machine learning needs: the Natural Language framework. This framework lets you detect languages and tags or split sentences into parts. Combine it with a custom Core ML model, and you can do custom text classification or tagging on the user's device.
In this Natural Language tutorial you'll find out how to detect the language of an arbitrary string, as well as detect which tags were mentioned in the string, including company, place, and personal names.
By the end of the tutorial, you'll have an app like this:
Setting up the UI
Open up Xcode and create a new single view application. Open Main.storyboard to add your UI. We need four labels and a text field. In order to easily lay them out, we'll use a stack view, so start by dragging in a stack view to the screen. Add three constraints between this stack view and the view:
- Leading space to safe area with a constant of 20
- Trailing space to safe area with a constant of 20
- Top space to safe area with a constant of 20
With that in place, add four labels inside the stack view, one below the other. Edit them to have the following text, from the top-most one to the bottom one:
You are speaking inEnglishand you are talking aboutApple
These are placeholder texts which you'll change in code later. I changed the English and Apple labels to have a bold font and larger text, just to make it look a bit nicer.
Next, drag over a new text field and position it underneath the stack view (not inside it). Add three new constraints to the this text field:
- Leading space to safe area with a constant of 20
- Trailing space to safe area with a constant of 20
- Vertical spacing to the stack view with a constant of 20
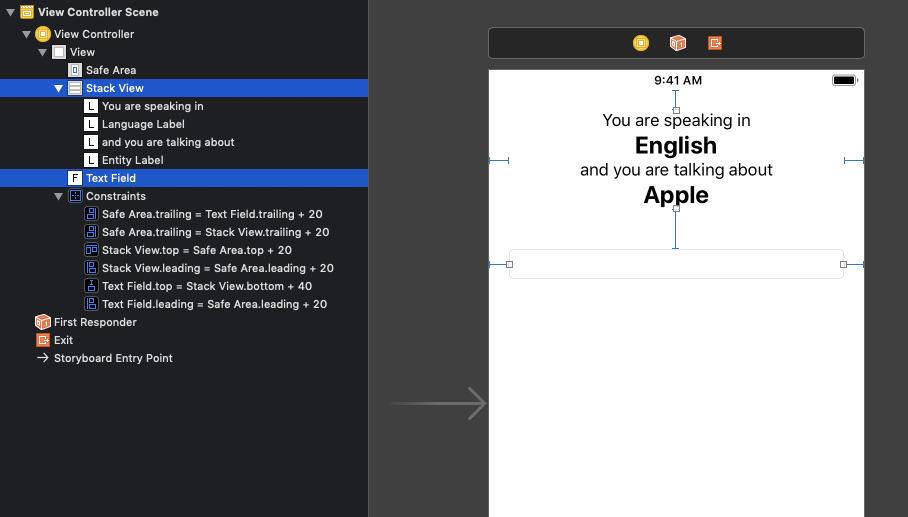
By the end of this your storyboard should look like this:
Next, open up ViewController.swift and drag in three new outlets:
- An outlet for the English label named
languageLabel - An outlet for the Apple label named
entityLabel - An outlet for the text field named
textField
@IBOutlet weak var languageLabel: UILabel!
@IBOutlet weak var entityLabel: UILabel!
@IBOutlet weak var textField: UITextField!
Now that our UI is in place, we can start hacking away!
Recognizing Languages
In order to recognize languages, naturally, we need a Language Recognizer. NLLanguageRecognizer is a class from Natural Language that can give you information about a given string's possible language. Start by importing Natural Language at the top of ViewController.swift:
import NaturalLanguage
Next, add the following property to the ViewController class, below the outlets:
let languageRecognizer = NLLanguageRecognizer()
Now it's time to add a new method to the class that we'll use to recognize our language:
func recognizeLanguage(_ text: String)-> NLLanguage? {
  languageRecognizer.reset()
  languageRecognizer.processString(text)
  return languageRecognizer.dominantLanguage
}
First we'll reset the recognizer to make sure it clears any strings we provided earlier. We'll then give it a new string to process and ask it for the dominant language.
The language recognizer can never be 100% sure, so the dominant language is the one it thinks is the most likely candidate. If you want to see other possible languages and just how likely they are, you can use the languageHypotheses method, which gives you a set of languages and a score of how likely they fit the given string.
You can also make the recognizer more precise by helping it out a bit: by setting the languageHints property you can tell the recognizer how likely you think each language is. It will then take this information into account when deciding the language of a string. You can also limit which languages are possible by setting the languageConstraints property.
Now that we have a way to recognize languages, let's hook it up to our text field and UI. Add the following lines to the bottom of viewDidLoad:
languageLabel.text = ""
entityLabel.text = ""
textField.addTarget(self,
  action: #selector(onTextFieldChanged), for: .editingChanged)
First we'll clear out the UI, and then add a function that will get called each time the text field's value changes.
Now it's time to implement that function. Add the following method to the class:
@objc func onTextFieldChanged(_ textField: UITextField) {
  guard let text = textField.text else {
    return
  }

  if let language = recognizeLanguage(text) {
    let name = language.rawValue
    languageLabel.text = name
  }
}
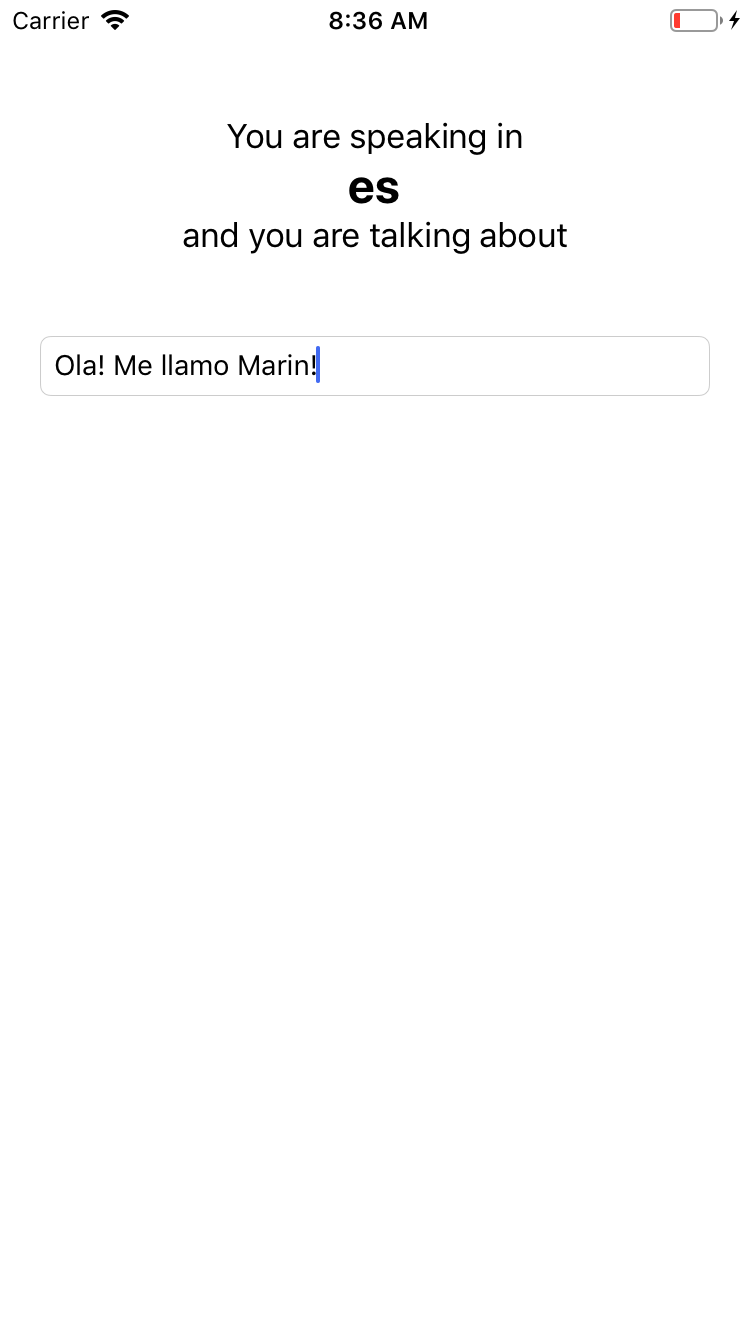
First we'll grab the text from the text field, and then call our previously defined method to get the language of the text. Finally, we'll set the language's rawValue to our label. The language is an enum with a raw string value representing the language code. ("en" for English, "es" for Spanish, etc.)
If you run the project now and type in a string, you should see the string's language pop up in the UI. Pretty cool!
Tagging Text
Now that we know the language, it's time to figure out what the user is talking about. For language recognition we used a recognizer, so, naturally, for tagging we use a tagger.
NLTagger is a very powerful class from Natural Language. It can detect parts of sentences (verbs, nouns, adjectives etc.), special characters (whitespace, quotes), words and idioms, as well as names places, people and organizations. That's a lot of stuff!
In our case, we're interested in the names of places, people and organizations. Things like "California", "Tim Cook" or "Apple". We'll detect these and display what word it is and what type of tag it is for each detected word.
Start by adding the following method to ViewController:
func recognizeTags(_ text: String) -> [(String, NLTag)] {
  let tags: [NLTag] = [.personalName, .placeName, .organizationName]
  let tagger = NLTagger(tagSchemes: [.nameType])
  tagger.string = text
}
This function takes a text input and returns a list of tagged words. The list elements are tuples where the first item is the actual word, and the second item is that word's tag.
We defined a list of tags we're interested in, created an NLTagger instance, and given it our text. We initialize it with the .nameType scheme because we want the tagger to find names inside our string. We can use other schemes, like the .lemma scheme which will give us a word's stem. Using these schemes we can detect lexical classes, languages, scripts and other word types.
Next, add the following code to the end of the method:
var results: [(String, NLTag)] = []
tagger.enumerateTags(
  in: text.startIndex..<text.endIndex,
  unit: .word,
  scheme: .nameType,
  options: [.omitWhitespace, .omitPunctuation, .joinNames],
  using: { tag, range in
    guard let tag = tag, tags.contains(tag) else {
      return true
    }

    print("Found tag \(tag) in text \"\(text[range])\"")
    results.append((String(text[range]), tag))
    return true
})
return results
This might seem a little dense at first, but bear with me. We want to enumerate trough every word the tagger found, so we call the enumerateTags method and make sure it goes from start to the end of the string. Again we use the .nameType scheme, and make sure we omit whitespace and punctuation since we don't need them. We also make sure names are joined so "Tim Cook" doesn't become a cook named Tim.
We give enumerate a closure to call for each new tag it found. In the closure we'll filter the tags so that we only save the ones we're interested in. If the tag is one of the ones we need, we'll append it to our result array, together with the actual word.
As we did in the previous section, we need to connect this method to our UI. Add the following code to the end of onTextFieldChanged:
let results = recognizeTags(text)
let entityText = results
  .map { (word, tag) in
    "\(word) (\(tag.rawValue))"
  }
  .joined(separator: ", ")
entityLabel.text = entityText
We'll get all the tag pairs, convert each one to a string where the tag type is in brackets, and join them all into a big comma-separated string. Finally, we'll set that as the label's text.
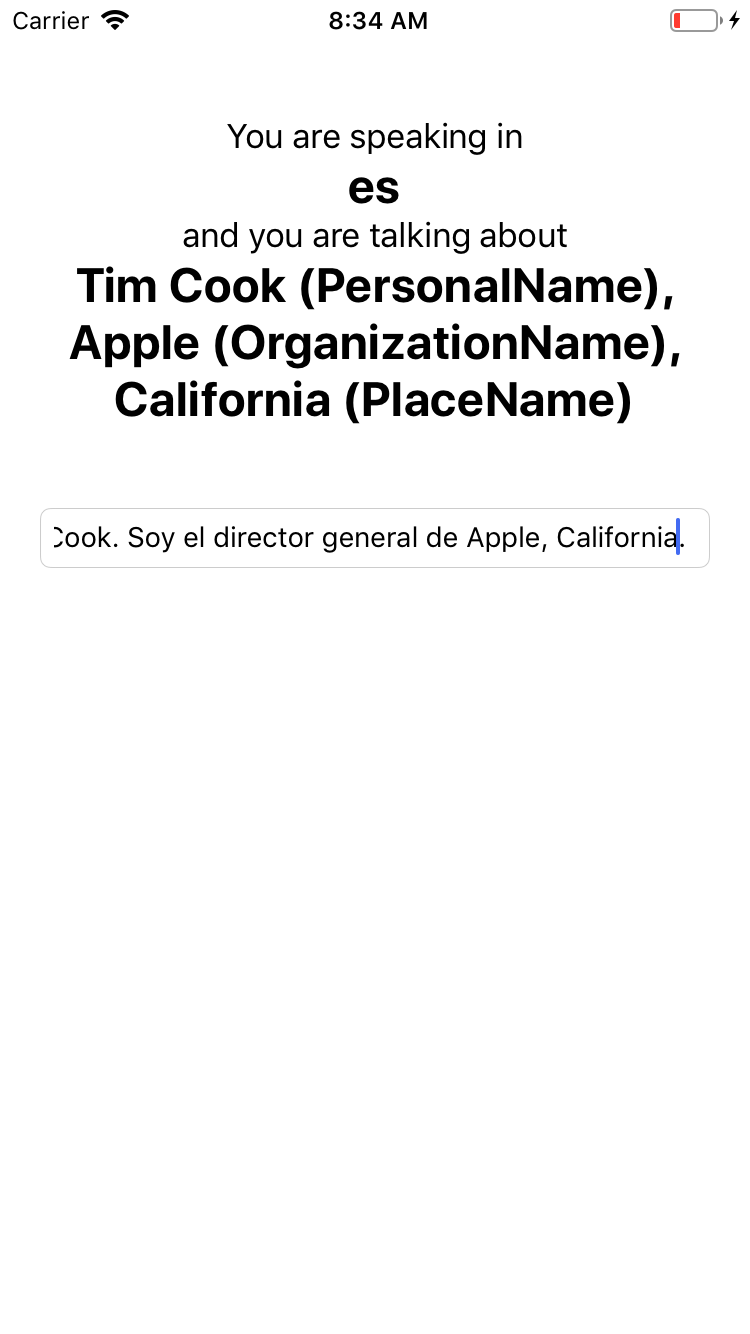
If you run the project now, you should see all the different types of names as well as the language.
Congratulations! You now have an app that recognizes both the language a user is writing in as well as what they're writing about!
Going Even Further
This tutorial only scratched the surface of what is possible with Natural Language. If you combine it with Core ML, you can train your own text classifiers or taggers. For instance, you can automatically categorize new listings in your web shop or detect inappropriate language and harassment in your chat app.
If you would like to read more about machine learning on iOS, check out our machine learning overview. Good luck!