JavaScript chat room tutorial
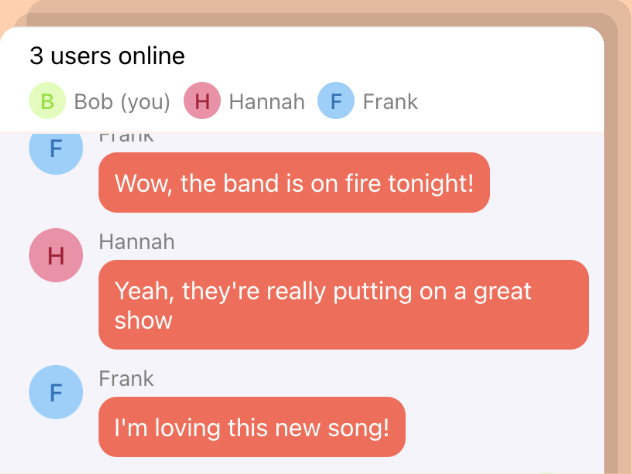
We're going to be building a real-time JavaScript chat room similar to Twitch.tv's chat using JavaScript and Scaledrone realtime messaging service. The app is going to be using Websockets on modern browsers and fallback technologies on older ones.
For the live users list feature to work we will be using Scaledrone's new observable rooms feature. The observable rooms feature will let us keep track of who is currently connected to the chat room.
Check out the working live example and grab the source code from GitHub.
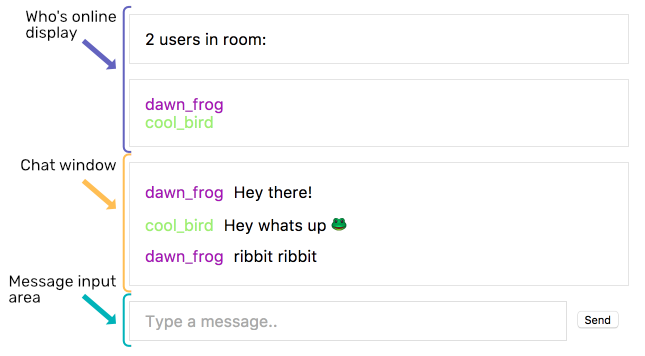
The chat room app is broken into three sections
- Who's online display - Shows online users count and user names
- Chat window - Real-time messages from users
- Message input area - A form for sending messages to the chat window
Setting up the skeleton of the app
The app is quite simple, it consists of two files:
index.htmlscript.js
Index.html
Grab the index.html file from here. The file contains:
- Scaledrone JavaScript library script tag
- Reference to the script.js file
- HTML Markup for the three sections
- CSS Styles
JavaScript part
First, we'll need to connect to a Scaledrone channel which you can create here for free. We'll also be generating a random name and color which we'll pass to Scaledrone to distinct the user.
const CHANNEL_ID = 'CHANNEL_ID_FROM_SCALEDRONE';
const drone = new ScaleDrone(CHANNEL_ID, {
 data: { // Will be sent out as clientData via events
   name: getRandomName(),
   color: getRandomColor(),
 },
});
We'll assign a random hex color and a random name to each user generated from a list of adjectives and a list of nouns.
function getRandomName() {
 const adjs = ["autumn", "hidden", "bitter", "misty", "silent", "empty", "dry", "dark", "summer", "icy", "delicate", "quiet", "white", "cool", "spring", "winter", "patient", "twilight", "dawn", "crimson", "wispy", "weathered", "blue", "billowing", "broken", "cold", "damp", "falling", "frosty", "green", "long", "late", "lingering", "bold", "little", "morning", "muddy", "old", "red", "rough", "still", "small", "sparkling", "throbbing", "shy", "wandering", "withered", "wild", "black", "young", "holy", "solitary", "fragrant", "aged", "snowy", "proud", "floral", "restless", "divine", "polished", "ancient", "purple", "lively", "nameless"];
 const nouns = ["waterfall", "river", "breeze", "moon", "rain", "wind", "sea", "morning", "snow", "lake", "sunset", "pine", "shadow", "leaf", "dawn", "glitter", "forest", "hill", "cloud", "meadow", "sun", "glade", "bird", "brook", "butterfly", "bush", "dew", "dust", "field", "fire", "flower", "firefly", "feather", "grass", "haze", "mountain", "night", "pond", "darkness", "snowflake", "silence", "sound", "sky", "shape", "surf", "thunder", "violet", "water", "wildflower", "wave", "water", "resonance", "sun", "wood", "dream", "cherry", "tree", "fog", "frost", "voice", "paper", "frog", "smoke", "star"];
 return (
   adjs[Math.floor(Math.random() * adjs.length)] +
   "_" +
   nouns[Math.floor(Math.random() * nouns.length)]
 );
}

function getRandomColor() {
 return '#' + Math.floor(Math.random() * 0xFFFFFF).toString(16);
}
We'll connect to a room called observable-room. Any room name will work, but for the live users functionality to work, we'll need to prefix the room name with observable-.
drone.on('open', error => {
 if (error) {
   return console.error(error);
 }
 console.log('Successfully connected to Scaledrone');

 const room = drone.subscribe('observable-room');
 room.on('open', error => {
   if (error) {
     return console.error(error);
   }
   console.log('Successfully joined room');
 });

 // More events code to follow..
});
Next, let's set up the code for handling users joining and leaving the room. A user who connects to a room is called a member in Scaledrone lingo.
Let's define a global members array to keep track of the current online users state.
let members = [];
Now that we have a members array we can add and remove joining members from it.
// Put this code into the drone.on('open') block
// right after the room 'open' listener

// List of currently online members, emitted once
room.on('members', m => {
 members = m;
 // updateMembersDOM(); uncomment later
});

// User joined the room
room.on('member_join', member => {
 members.push(member);
 // updateMembersDOM(); uncomment later
});

// User left the room
room.on('member_leave', ({id}) => {
 const index = members.findIndex(member => member.id === id);
 members.splice(index, 1);
 // updateMembersDOM(); uncomment later
});
We'll need a data event an listener to listen to the messages sent by users.
// Add this after 'member_leave' event
room.on('data', (text, member) => {
 if (member) {
   // addMessageToListDOM(text, member); uncomment later
 } else {
   // Message is from server
 }
});
You can now test out the app. Check the console logs, you should see a message that you successfully connected to the room.

UI code
We won't be using any fancy frameworks but rather use the regular DOM API. Let's write a function to update the who's online display called updateMembersDOM and a function to add a new message to the chat window called addMessageToListDOM. Make sure you uncomment those two function calls in the previous code.
const DOM = {
membersCount: document.querySelector('.members-count'),
membersList: document.querySelector('.members-list'),
messages: document.querySelector('.messages'),
input: document.querySelector('.message-form__input'),
form: document.querySelector('.message-form'),
};
function createMemberElement(member) {
const { name, color } = member.clientData;
const el = document.createElement('div');
el.appendChild(document.createTextNode(name));
el.className = 'member';
el.style.color = color;
return el;
}
function updateMembersDOM() {
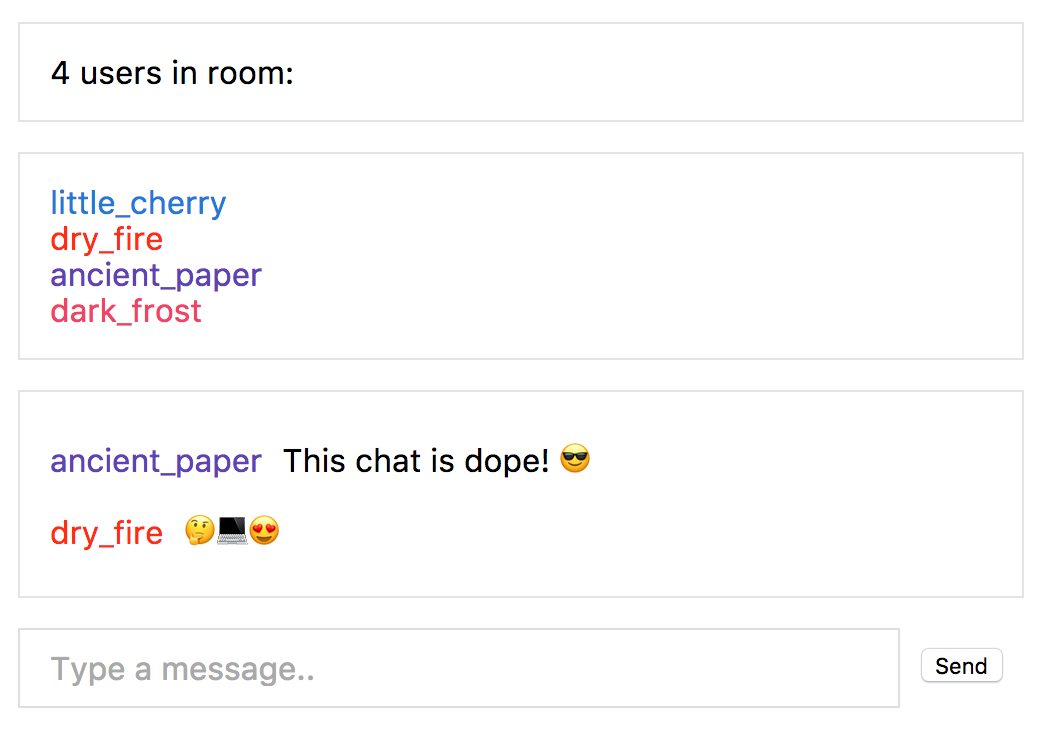
DOM.membersCount.innerText = `${members.length} users in room:`;
DOM.membersList.innerHTML = '';
members.forEach(member =>
DOM.membersList.appendChild(createMemberElement(member))
);
}
function createMessageElement(text, member) {
const el = document.createElement('div');
el.appendChild(createMemberElement(member));
el.appendChild(document.createTextNode(text));
el.className = 'message';
return el;
}
function addMessageToListDOM(text, member) {
const el = DOM.messages;
const wasTop = el.scrollTop === el.scrollHeight - el.clientHeight;
el.appendChild(createMessageElement(text, member));
if (wasTop) {
el.scrollTop = el.scrollHeight - el.clientHeight;
}
}
Lastly, let's hook up the submit button. When receiving the submit event (which can be triggered by clicking "Send" or pressing Enter) we'll clear the input and send the message into the room.
DOM.form.addEventListener('submit', sendMessage);

function sendMessage() {
 const value = DOM.input.value;
 if (value === '') {
   return;
 }
 DOM.input.value = '';
 drone.publish({
   room: 'observable-room',
   message: value,
 });
}
Good job! 💪
And we're done! You can grab the full script.js file from here.
If you have any questions or feedback feel free to contact us.