iOS Chat Tutorial: Building A Realtime Messaging App
One thing that can differentiate your app from other apps on the market is building in chat functionality. Online marketplaces, social networks and collaboration tools can all benefit from in-app chat. Your users can communicate with each other without having to exchange contact information or leave the app.
In this tutorial, we're going to be building a realtime group chat for iOS using the Scaledrone Swift API Client. It will work very similarly to apps such as WhatsApp, Facebook Messager and LINE.
By following this tutorial you'll make a chat application that works cross platform with our Android chat tutorial.
You can find the full source code on GitHub.
Note: This tutorial uses Xcode 10 and Swift 4.2.
Setting Up The App
First things first, in Xcode, create a new Single View App, and call it whatever you like. To make our lives easer, we'll use two dependencies. The first one is Scaledrone, which simplifies real time messaging. The second one is MessageKit, a chat UI library which provides a customizable list of messages, with chat bubbles, avatars, username labels and other neat UI features.
Now that we have our project, we need to add Scaledrone and MessageKit as dependencies. We'll do this by using CocoaPods, a dependency manager for iOS. If you don't have CocoaPods installed, install it by following the instructions on the CocoaPods website.
In Terminal, navigate to the root directory of your Xcode project using the cd command.
cd Path/To/YourProject/
Once you're in the directory, run the following command to initialize CocoaPods.
pod init
This will create a text file called Podfile in the directory. Open it with your favorite text editor, and insert the following lines right above the end.
pod 'MessageKit'
pod 'Scaledrone', '~> 0.3.0'
Back in Terminal, still in the same directory, run the following command:
pod install
This will install MessageKit, Scaledrone and all of their dependencies. It will also generate a .xcworkspace file. Close your project in Xcode, and open up the workspace by double clicking on the .workspace file. In order for your dependencies to work, you need to use the workspace file, and not .xcodeproj.
Note: At the time of writing, MessageKit is not updated for Swift 4.2, so you might get compiler errors when building after installing the pod. To fix this, click on the Pods project in the Project navigator, and then select the MessageKit target. Go into Build Settings and set Swift Language Version to Swift 4. After this the errors should disappear.
Creating the UI
Thanks to MessageKit, creating a good looking chat UI is a pretty simple process. Xcode has already generated a ViewController.swift file for you. This will be the main view controller in your app.
The first thing you'll do is import the MessageKit library so you can work with it. Add the following line to the top of the file.
import MessageKit
Now change the ViewController class declaration so that it inherits from MessagesViewController, and not UIViewController.
class ViewController: MessagesViewController {
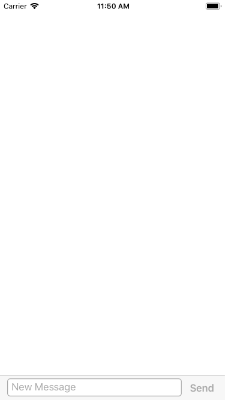
MessagesViewController is the cornerstone of MessageKit. It contains a collection view that displays messages, as well as an input bar for sending a new message.
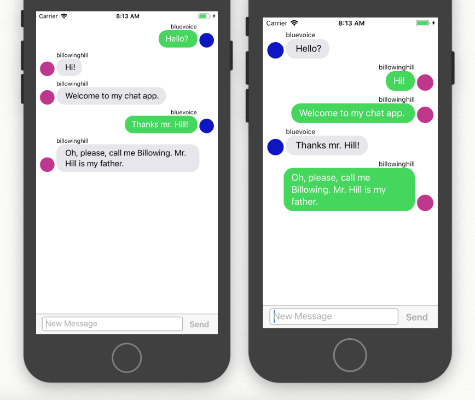
If you run the project now, you'll see that we already have a basic chat UI set up. The only problem is that we can't actually send any messages, so the messages collection view is blank.
First of all, we need a way to store all the messages that we want to display. We'll need a model to hold our messages, as well as a model for the users. Create a new file called Message.swift and add the following code:
import Foundation
import UIKit
import MessageKit

struct Member {
  let name: String
  let color: UIColor
}

struct Message {
  let member: Member
  let text: String
  let messageId: String
}
These are just simple models to hold our message data. Instead of avatars, each member will have a color assigned to them and displayed next to their message.
Because MessageKit works with messages that conform to the MessageType protocol, we'll extend Message to do so:
extension Message: MessageType {
  var sender: Sender {
    return Sender(id: member.name, displayName: member.name)
  }

  var sentDate: Date {
    return Date()
  }

  var kind: MessageKind {
    return .text(text)
  }
}
Back in ViewController.swift, add an array of messages above viewDidLoad, as well as a property for the current user:
var messages: [Message] = []
var member: Member!
Now that we have those, we need to connect them to the UI. To update the view, as well as handle user interaction, we need to implement four protocols:
MessagesDataSourcewhich provides the number and content of messages.MessagesLayoutDelegatewhich provides height, padding and alignment for different views.MessagesDisplayDelegatewhich provides colors, styles and views that define the look of the messages.MessageInputBarDelegatewhich handles sending and typing new messages.
We'll implement these in a series of four extensions of the ViewController class, starting with the data source. Add this code to the bottom of the file:
extension ViewController: MessagesDataSource {
  func numberOfSections(
    in messagesCollectionView: MessagesCollectionView) -> Int {
    return messages.count
  }

  func currentSender() -> Sender {
    return Sender(id: member.name, displayName: member.name)
  }

  func messageForItem(
    at indexPath: IndexPath,
    in messagesCollectionView: MessagesCollectionView) -> MessageType {

    return messages[indexPath.section]
  }

  func messageTopLabelHeight(
    for message: MessageType,
    at indexPath: IndexPath,
    in messagesCollectionView: MessagesCollectionView) -> CGFloat {

    return 12
  }

  func messageTopLabelAttributedText(
    for message: MessageType,
    at indexPath: IndexPath) -> NSAttributedString? {

    return NSAttributedString(
      string: message.sender.displayName,
      attributes: [.font: UIFont.systemFont(ofSize: 12)])
  }
}
These functions are pretty straightforward. First we create a Sender instance from our member. Then, we return the number of the messages. Each section contains a new message, so we simply return the message for that section index. Lastly, we return an attributed text containing the username of the sender for a label above the message.
The next protocol we need to implement is the layout delegate. Since we're not customizing the layout, this will be really easy:
extension ViewController: MessagesLayoutDelegate {
  func heightForLocation(message: MessageType,
    at indexPath: IndexPath,
    with maxWidth: CGFloat,
    in messagesCollectionView: MessagesCollectionView) -> CGFloat {

    return 0
  }
}
We're simply returning 0 for the height, and MessageKit will take care of calculating it for us.
To implement the MessagesDisplayDelegate, we'll make sure we set the member's color as the background color of the avatar view.
extension ViewController: MessagesDisplayDelegate {
  func configureAvatarView(
    _ avatarView: AvatarView,
    for message: MessageType,
    at indexPath: IndexPath,
    in messagesCollectionView: MessagesCollectionView) {

    let message = messages[indexPath.section]
    let color = message.member.color
    avatarView.backgroundColor = color
  }
}
The last protocol we need to implement is the input bar delegate. This allows us to actually send a new message. For now, we'll just append the message onto the array. Later on we'll actually send it to Scaledrone.
extension ViewController: MessageInputBarDelegate {
  func messageInputBar(
    _ inputBar: MessageInputBar,
    didPressSendButtonWith text: String) {

    let newMessage = Message(
      member: member,
      text: text,
      messageId: UUID().uuidString)

    messages.append(newMessage)
    inputBar.inputTextView.text = ""
    messagesCollectionView.reloadData()
    messagesCollectionView.scrollToBottom(animated: true)
  }
}
We create a new message with the text provided by the method. We use the built-in UUID class to get a unique string which we'll use for the message's ID. We'll then append that message to the array, and reload the collection view so it updates.
Now we implemented all the protocols we need, but there's still one small step we need to do. We need to tell MessageKit to use ViewController as its delegate for all of these things. Add these lines to the bottom of viewDidLoad:
member = Member(name: "bluemoon", color: .blue)
messagesCollectionView.messagesDataSource = self
messagesCollectionView.messagesLayoutDelegate = self
messageInputBar.delegate = self
messagesCollectionView.messagesDisplayDelegate = self
We'll also hard-code a member to use for testing. Later we'll generate a username and color randomly.
If you run the app now, you'll see that you can send new messages!
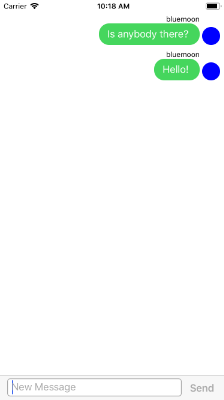
Okay, you you're not actually sending the messages to the internet, but you do have a working chat UI. In just a few more minutes, you'll have a fully working chat app.
A Random User
In your production app, you'll probably have a login screen which will authenticate your users. For the purposes of this tutorial, we'll assign a random name and a random color to a user when they launch the app.
We'll implement this as extensions on String and UIColor. Create a new Swift file called Extensions.swift. In the file, add the following extension to get a random name.
import Foundation
import UIKit

extension String {
  static var randomName: String {
    let adjectives = ["autumn", "hidden", "bitter", "misty", "silent", "empty", "dry", "dark", "summer", "icy", "delicate", "quiet", "white", "cool", "spring", "winter", "patient", "twilight", "dawn", "crimson", "wispy", "weathered", "blue", "billowing", "broken", "cold", "damp", "falling", "frosty", "green", "long", "late", "lingering", "bold", "little", "morning", "muddy", "old", "red", "rough", "still", "small", "sparkling", "throbbing", "shy", "wandering", "withered", "wild", "black", "young", "holy", "solitary", "fragrant", "aged", "snowy", "proud", "floral", "restless", "divine", "polished", "ancient", "purple", "lively", "nameless"]
    let nouns = ["waterfall", "river", "breeze", "moon", "rain", "wind", "sea", "morning", "snow", "lake", "sunset", "pine", "shadow", "leaf", "dawn", "glitter", "forest", "hill", "cloud", "meadow", "sun", "glade", "bird", "brook", "butterfly", "bush", "dew", "dust", "field", "fire", "flower", "firefly", "feather", "grass", "haze", "mountain", "night", "pond", "darkness", "snowflake", "silence", "sound", "sky", "shape", "surf", "thunder", "violet", "water", "wildflower", "wave", "water", "resonance", "sun", "wood", "dream", "cherry", "tree", "fog", "frost", "voice", "paper", "frog", "smoke", "star"]

    return adjectives.randomElement()! + nouns.randomElement()!
  }
}
We are creating random usernames by combining randomly selected adjectives and nouns. This will give usernames like "hiddensun" or "redstar".
Now we'll do a similar thing, but for getting a random color.
extension UIColor {
  static var random: UIColor {
    return UIColor(
      red: CGFloat.random(in: 0...1),
      green: CGFloat.random(in: 0...1),
      blue: CGFloat.random(in: 0...1),
      alpha: 1)
  }
}
To get a random color, we simply select a random value for red, green and blue. Both of these extensions are using Swift 4.2's new random number generation.
Now that we have those in place, it's time to actually use them. Open up ViewController.swift and in viewDidLoad, change the line where you create the member to the following:
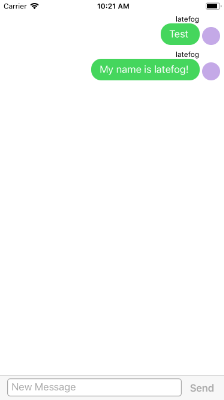
member = Member(name: .randomName, color: .random)
Run your app a few times and send some messages. You should see a different color each time you run the app.
Preparing Your Members
We'll be sending and receiving messages and members as JSON dictionaries, which means we need a way to create them from a dictionary, as well as get a dictionary representation from the model structs. We'll add this to Member by extending it with two new things: An initializer that will create it from JSON, as well as a computed property to get a dictionary from its properties.
Before we do that, we have one problem. Member has a UIColor property, which can't be easily represent as a JSON value. So, we'll use hexadecimal color codes to represent color. A hexadecimal color code looks like this: #FF5733. It has six digits. The first two represent the value of red between 0 and 255 in hex. The second two represent green, while the final two represent blue.
Knowing that, we can convert UIColor back and forth to hex codes with a simple extension. Add this extension to Extensions.swift:
extension UIColor {
  convenience init(hex: String) {
    var hex = hex
    if hex.hasPrefix("#") {
        hex.remove(at: hex.startIndex)
    }

    var rgb: UInt64 = 0
    Scanner(string: hex).scanHexInt64(&rgb)

    let r = (rgb & 0xff0000) >> 16
    let g = (rgb & 0xff00) >> 8
    let b = rgb & 0xff

    self.init(
      red: CGFloat(r) / 0xff,
      green: CGFloat(g) / 0xff,
      blue: CGFloat(b) / 0xff,
      alpha: 1
    )
  }

  var hexString: String {
    var r: CGFloat = 0
    var g: CGFloat = 0
    var b: CGFloat = 0
    var a: CGFloat = 0

    self.getRed(&r, green: &g, blue: &b, alpha: &a)

    return String(
      format: "#%02X%02X%02X",
      Int(r * 0xff),
      Int(g * 0xff),
      Int(b * 0xff)
    )
  }
}
For this tutorial, the details of how this works are not really important. The gist is that we take the hex code as a single number, and filter out only the two digits that we need for the color (red, green or blue). We then convert that number into a number between 0 and 1, since that's what UIColor uses.
Now that we can convert our color, let's add the ability to convert between a JSON dictionary and Member. In Message.swift, add the following extension to the bottom of the file:
extension Member {
  var toJSON: Any {
    return [
      "name": name,
      "color": color.hexString
    ]
  }

  init?(fromJSON json: Any) {
    guard
      let data = json as? [String: Any],
      let name = data["name"] as? String,
      let hexColor = data["color"] as? String
    else {
      print("Couldn't parse Member")
      return nil
    }

    self.name = name
    self.color = UIColor(hex: hexColor)
  }
}
This is typical dictionary parsing code. The json contains two keys, name and color, which contain the username and the hex code for the color. We convert those into Swift-friendly objects and voilà, we have our member.
Connecting To Scaledrone
We prepped all of our ingredients, now it's time to get cooking! Thanks to Scaledrone's iOS SDK, sending and receiving chat messages is really easy.
Before we start making network requests, we need to make sure iOS doesn't stop us. We'll do this by disabling App Transport Security. Open Info.plist in your main target. Add a new key called "App Transport Security Settings". Inside of that key, add one more key called "Allow Arbitrary Loads" and set its value to "YES".

If you don't have a Scaledrone account yet, open up Scaledrone.com and create a new free account. To successfully connect to Scaledrone you need to get your own channel ID from the Scaledrone's dashboard. To do that go to the dashboard and click the big green +Create Channel button to get started. You can choose Never require authentication for now. Note down the channel ID from the just created channel, you'll need it in a bit.
Create a new Swift file called ChatService.swift. In this file, add a new class called ChatService:
import Foundation
import Scaledrone

class ChatService {
  private let scaledrone: Scaledrone
  private let messageCallback: (Message)-> Void

  private var room: ScaledroneRoom?

  init(member: Member, onRecievedMessage: @escaping (Message)-> Void) {
    self.messageCallback = onRecievedMessage
    self.scaledrone = Scaledrone(
      channelID: "YOUR-CHANNEL-ID",
      data: member.toJSON)
    scaledrone.delegate = self
  }

  func connect() {
    scaledrone.connect()
  }
}
In the initializer, we'll receive the current member as well as a closure that we'll call each time a new message arrives. We'll use that callback to update our view controller with new messages.
We'll create a new instance of Scaledrone, which manages connecting to the service. Remember that channel ID from above? Make sure to pass it here so Scaledrone knows which channel to connect to.
We'll also pass it the data for the currently logged in member. If you have additional data about the user or the client, this is a good way to supply that data, instead of having to send it with each message.
Connecting to Scaledrone is simply a matter of calling connect on the Scaledrone instance. To know what's going on after connecting to Scaledrone, we'll implement the ScaledroneDelegate protocol.
Once Scaledrone connects, we need to enter a room. A room is a group of users that we can send messages to. You listen to those messages by subscribing to a room of a specific name.
extension ChatService: ScaledroneDelegate {
  func scaledroneDidConnect(scaledrone: Scaledrone, error: NSError?) {
    print("Connected to Scaledrone")
    room = scaledrone.subscribe(roomName: "observable-room")
    room?.delegate = self
  }

  func scaledroneDidReceiveError(scaledrone: Scaledrone, error: NSError?) {
    print("Scaledrone error", error ?? "")
  }

  func scaledroneDidDisconnect(scaledrone: Scaledrone, error: NSError?) {
    print("Scaledrone disconnected", error ?? "")
  }
}
Once Scaledrone connects, we'll subscribe to a room. If there's an error, we'll print it out to the console.
Note: You might have noticed that we named our name Scaledrone room
observable-room. You can name the room anything you want, a single user can actually connect to an infinite amount of rooms for all sorts of application scenarios. However, in order for messages to contain the info of the sender, you need to prefix the room name with "observable-". Read more...
To listen to new messages, there's one more protocol we need to implement: ScaledroneRoomDelegate.
extension ChatService: ScaledroneRoomDelegate {
  func scaledroneRoomDidConnect(room: ScaledroneRoom, error: NSError?) {
    print("Connected to room!")
  }

  func scaledroneRoomDidReceiveMessage(
    room: ScaledroneRoom,
    message: Any,
    member: ScaledroneMember?) {

    guard
      let text = message as? String,
      let memberData = member?.clientData,
      let member = Member(fromJSON: memberData)
    else {
      print("Could not parse data.")
      return
    }

    let message = Message(
      member: member,
      text: text,
      messageId: UUID().uuidString)
    messageCallback(message)
  }
}
When we receive a new message, we'll try to convert it into a String. We then create a Member from the data we received in the function, using the initializer we created earlier. With those two pieces we construct the message, giving it a unique ID. Finally we call the callback so our view controller knows a new message arrived.
Now that we can receive messages, we also need to send them. With Scaledrone, this is really easy: it's just one line of code. Add this function to the bottom of the ChatService class:
func sendMessage(_ message: String) {
  room?.publish(message: message)
}
That's all there is to connecting with Scaledrone! Now let's hook this all up to our view controller.
Final Touches
We'll need to modify ViewController.swift to use the new ChatService we created. First of all, add a property to the top of the class to store the ChatService.
var chatService: ChatService!
Next, add the following code to the bottom of viewDidLoad:
chatService = ChatService(member: member, onRecievedMessage: {
  [weak self] message in
  self?.messages.append(message)
  self?.messagesCollectionView.reloadData()
  self?.messagesCollectionView.scrollToBottom(animated: true)
})

chatService.connect()
When we get a new message, we'll refresh the UI. We'll also connect to Scaledrone as soon as our screen gets loaded.
Finally, in the MessageInputBarDelegate extension, change the contents of the messageInputBar(_:didPressSendButtonWith:) method to just the following two lines:
chatService.sendMessage(text)
inputBar.inputTextView.text = ""
Run the app and send a few messages. If it looks the same as before: that's good! It looks the same, but this time it's actually sending and receiving the message to and from Scaledrone.
Open up another simulator or run the app on a device, and try to send messages. Congrats! You are now talking to yourself. :)
And We're Done!
There you go! With Scaledrone and MessageKit, adding chat to your app is incredibly easy, so you have no excuses left! You can find the full source code on GitHub.
Here are some ideas on features you can add, all using Scaledrone's APIs:
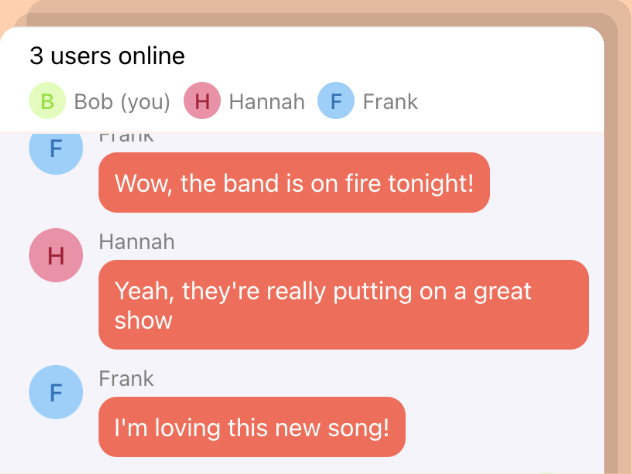
- Who's online
- Currently typing status
- Chat history
- Sending images and attachments
- Authentication
You can find the full source code or run the working prototype on GitHub. If you have any questions or feedback feel free to contact us.
This tutorial only scratched what Scaledrone can do for you and is the ideal basis for any of your future realtime needs.
Where to now?
In Part 2 of the tutorial we learn how to add typing indicators and a list of online members to your app. Check it out!