WebRTC Chat Tutorial
This tutorial will teach you:
- The basics of WebRTC
- How to create a 1-on-1 text chat where users can enter their username and be assigned a random emoji avatar
- How to use
RTCDataChannelto send peer to peer messages - How to use Scaledrone realtime messaging service for signaling so that no server coding is needed
For a WebRTC video chat tutorial check out our other post.
What is WebRTC?
WebRTC is a collection of communications protocols and APIs that enable real-time peer to peer connections within the browser. It's perfect for multiplayer games, chat, video and voice conferences or file sharing.
WebRTC is available in most modern browsers except Safari. It's currently supported by Chrome, Firefox, Edge and Opera. Safari has listed support for WebRTC as being in development.
WebRTC terms
Signaling
The discovery and negotiation process of WebRTC peers is called signaling. For two devices in different networks to find each other they need to use a central service called a signaling server. Using the signaling server two devices can discover each other and exchange negotiation messages. WebRTC does not specify signaling; different technologies such as WebSockets can be used for it.
ICE Candidates
Two peers exchange ICE candidates until they find a method of communication that they both support. After the connection has been established ICE candidates can be traded again to upgrade to a better and faster communication method.
STUN Server
STUN servers are used to get an external network address and to pass firewalls.
HTML Markup
Our chat will have two sections: the messages section where chat bubbles appear and the footer from where you can insert and send a message.
<div class="content">
  <div class="messages"></div>
  <form class="footer" onsubmit="return false;">
    <input type="text" placeholder="Your message..">
    <button type="submit">Send</button>
  </form>
</div>
To render the incoming messages, we'll use a template element. The template element will not be rendered in DOM but will be accessible from our JavaScript code.
<template data-template="message">
  <div class="message">
    <div class="message__name"></div>
    <div class="message__bubble"></div>
  </div>
</template>
The full index.html file along with some CSS can be found from here.
JavaScript Setup
First, let's set up some initial variables.
Each user will be assigned a random emoji to act as an avatar. If animals are not your thing, feel free to replace them with emojis of your choice.
const possibleEmojis = [
  '🐀','🐁','🐭','🐹','🐂','🐃','🐄','🐮','🐅','🐆','🐯','🐇','🐐','🐑','🐏','🐴',
  '🐎','🐱','🐈','🐰','🐓','🐔','🐤','🐣','🐥','🐦','🐧','🐘','🐩','🐕','🐷','🐖',
  '🐗','🐫','🐪','🐶','🐺','🐻','🐨','🐼','🐵','🙈','🙉','🙊','🐒','🐉','🐲','🐊',
  '🐍','🐢','🐸','🐋','🐳','🐬','🐙','🐟','🐠','🐡','🐚','🐌','🐛','🐜','🐝','🐞',
];
function randomEmoji() {
  const randomIndex = Math.floor(Math.random() * possibleEmojis.length);
  return possibleEmojis[randomIndex];
}
const emoji = randomEmoji();
Ask the user for their name.
const name = prompt("What's your name?");
Each 1-on-1 chat will be held on a separate URL so that users could share a direct link with a friend.
// Generate random chat hash if needed
if (!location.hash) {
  location.hash = Math.floor(Math.random() * 0xFFFFFF).toString(16);
}
const chatHash = location.hash.substring(1);
For WebRTC specific code we'll define a configuration variable defining a url to Google's public STUN server. We'll also define the global RTCPeerConnection and RTCDataChannel variables.
const configuration = {
  iceServers: [{
    url: 'stun:stun.l.google.com:19302'
  }]
};
// RTCPeerConnection
let pc;
// RTCDataChannel
let dataChannel;
Connecting to a signaling server
For two peers in different networks to find each other they need to use a central service called a signaling server. WebRTC does not define signaling and many means of transportation can be used.
To avoid writing server side code, we will use Scaledrone realtime messaging service. Create a free Scaledrone account and replace the channel ID. If you wish to write your own signaling server, this tutorial will still work fine without using Scaledrone.
To import the Scaledrone JavaScript library into your project add this script tag before the closing </head> tag.
<script type='text/javascript' src='https://cdn.scaledrone.com/scaledrone.min.js'></script>
Scaledrone works as a central socket server between remote devices. Once a device joins a room it can see who else is connected to that room and send them messages.
The members event will trigger with a list of connected devices (including ourselves).
- When we are the first user connected, let's wait for an offer from another user.
- When we are the second user connected, let's send an offer to the other user.
- If there are more than two users connected the room is full.
// TODO: Replace with your own channel ID
const drone = new ScaleDrone('YOUR_SCALEDRONE_CHANNEL_ID');
// Scaledrone room name needs to be prefixed with 'observable-'
const roomName = 'observable-' + chatHash;
// Scaledrone room used for signaling
let room;

// Wait for Scaledrone signaling server to connect
drone.on('open', error => {
  if (error) {
    return console.error(error);
  }
  room = drone.subscribe(roomName);
  room.on('open', error => {
    if (error) {
      return console.error(error);
    }
    console.log('Connected to signaling server');
  });
  // We're connected to the room and received an array of 'members'
  // connected to the room (including us). Signaling server is ready.
  room.on('members', members => {
    if (members.length >= 3) {
      return alert('The room is full');
    }
    // If we are the second user to connect to the room we will be creating the offer
    const isOfferer = members.length === 2;
    startWebRTC(isOfferer);
  });
});
The sendSignalingMessage() function will be used to send a signaling message to devices connected to the Scaledrone room.
// Send signaling data via Scaledrone
function sendSignalingMessage(message) {
  drone.publish({
    room: roomName,
    message
  });
}
WebRTC
The RTCPeerConnection instance pc represents a WebRTC connection between the local and a remote peer.
RTCPeerConnection emit handling
onicecandidatereturns locally generated ICE candidates for signaling to other users. We pass it on to our signaling service.onnegotiationneededis triggered when a change has occurred which requires session negotiation. This event starts thecreateOfferprocess and is only handled by the user that is an offerer.ondatachannelis emitted when anRTCDataChannelis added to the connection by the remote peer.
If the user is an offerer, we'll create the RTCDataChannel ourselves.
function startWebRTC(isOfferer) {
  console.log('Starting WebRTC in as', isOfferer ? 'offerer' : 'waiter');
  pc = new RTCPeerConnection(configuration);

  // 'onicecandidate' notifies us whenever an ICE agent needs to deliver a
  // message to the other peer through the signaling server
  pc.onicecandidate = event => {
    if (event.candidate) {
      sendSignalingMessage({'candidate': event.candidate});
    }
  };


  if (isOfferer) {
    // If user is offerer let them create a negotiation offer and set up the data channel
    pc.onnegotiationneeded = () => {
      pc.createOffer(localDescCreated, error => console.error(error));
    }
    dataChannel = pc.createDataChannel('chat');
    setupDataChannel();
  } else {
    // If user is not the offerer let wait for a data channel
    pc.ondatachannel = event => {
      dataChannel = event.channel;
      setupDataChannel();
    }
  }

  startListentingToSignals();
}
When creating the RTCDataChannel ourselves by calling createDataChannel() or when listening to the ondatachannel event we call the setupDataChannel() function to set up data channel specific listeners.
// Hook up data channel event handlers
function setupDataChannel() {
checkDataChannelState();
dataChannel.onopen = checkDataChannelState;
dataChannel.onclose = checkDataChannelState;
dataChannel.onmessage = event =>
insertMessageToDOM(JSON.parse(event.data), false)
}
function checkDataChannelState() {
console.log('WebRTC channel state is:', dataChannel.readyState);
if (dataChannel.readyState === 'open') {
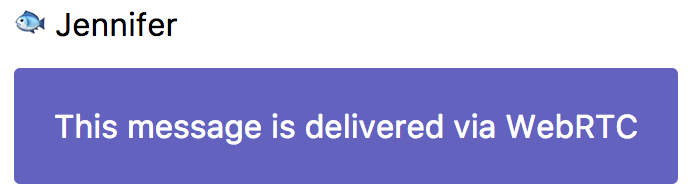
insertMessageToDOM({content: 'WebRTC data channel is now open'});
}
}
To listen to messages from the signaling service define a startListentingToSignals() function. We are interested in two types of messages; these are the same messages that we send out using the sendSignalingMessage() function:
message.sdp- Session Description Protocol is a string describing the local end of the remote connection. After receiving an offer or answer from another peer, we can answer it.message.candidate- add the new ICE candidate to our connections remote description.
function startListentingToSignals() {
  // Listen to signaling data from Scaledrone
  room.on('data', (message, client) => {
    // Message was sent by us
    if (client.id === drone.clientId) {
      return;
    }
    if (message.sdp) {
      // This is called after receiving an offer or answer from another peer
      pc.setRemoteDescription(new RTCSessionDescription(message.sdp), () => {
        console.log('pc.remoteDescription.type', pc.remoteDescription.type);
        // When receiving an offer lets answer it
        if (pc.remoteDescription.type === 'offer') {
          console.log('Answering offer');
          pc.createAnswer(localDescCreated, error => console.error(error));
        }
      }, error => console.error(error));
    } else if (message.candidate) {
      // Add the new ICE candidate to our connections remote description
      pc.addIceCandidate(new RTCIceCandidate(message.candidate));
    }
  });
}
localDescCreated() gets called when creating an offer and when answering one. It updates the local description of the connection.
function localDescCreated(desc) {
  pc.setLocalDescription(
    desc,
    () => sendSignalingMessage({'sdp': pc.localDescription}),
    error => console.error(error)
  );
}
Inserting chat messages into the DOM
We'll render a new message on three occasions:
- We receive a message from the remote peer through the
RTCDataChannel.onmessageevent. - We send out a message ourselves using the form in the footer.
- Administrative messages showing us the state of the application.
Earlier in the tutorial we defined an HTML template with the data-template='message' data attribute. We can now query this template and use it to create message elements. Then we will insert those message elements into the messages list.
function insertMessageToDOM(options, isFromMe) {
  const template = document.querySelector('template[data-template="message"]');
  const nameEl = template.content.querySelector('.message__name');
  if (options.emoji || options.name) {
    nameEl.innerText = options.emoji + ' ' + options.name;
  }
  template.content.querySelector('.message__bubble').innerText = options.content;
  const clone = document.importNode(template.content, true);
  const messageEl = clone.querySelector('.message');
  if (isFromMe) {
    messageEl.classList.add('message--mine');
  } else {
    messageEl.classList.add('message--theirs');
  }

  const messagesEl = document.querySelector('.messages');
  messagesEl.appendChild(clone);

  // Scroll to bottom
  messagesEl.scrollTop = messagesEl.scrollHeight - messagesEl.clientHeight;
}
Lastly, let's hook up the form so we could write and send our messages.
When the form's submit event is triggered we'll send our name, emoji and content as a JSON string using the RTCDataChannel. After that our message gets inserted into the DOM and the form gets cleared.
const form = document.querySelector('form');
form.addEventListener('submit', () => {
  const input = document.querySelector('input[type="text"]');
  const value = input.value;
  input.value = '';

  const data = {
    name,
    content: value,
    emoji,
  };

  dataChannel.send(JSON.stringify(data));

  insertMessageToDOM(data, true);
});

insertMessageToDOM({content: 'Chat URL is ' + location.href});
Lastly 🎉
Check out the live demo and full source code. For a WebRTC video chat tutorial check out our other post.